Showing posts with label curtin. Show all posts

Friday, November 12, 2010

Car launch 2010

Friday 12th November

Design boards: These are prints taken from our 2010 design report that is a submission required for the FSAE competition. They detail the design and manufacture processes that create our race car.

High Tech: The highly technical support method for our design board display, I think it worked well to create that motorsports feel.


Above: Drinks and nibbles supplied by the team, we enjoy giving back to those that give so much support to us.
 
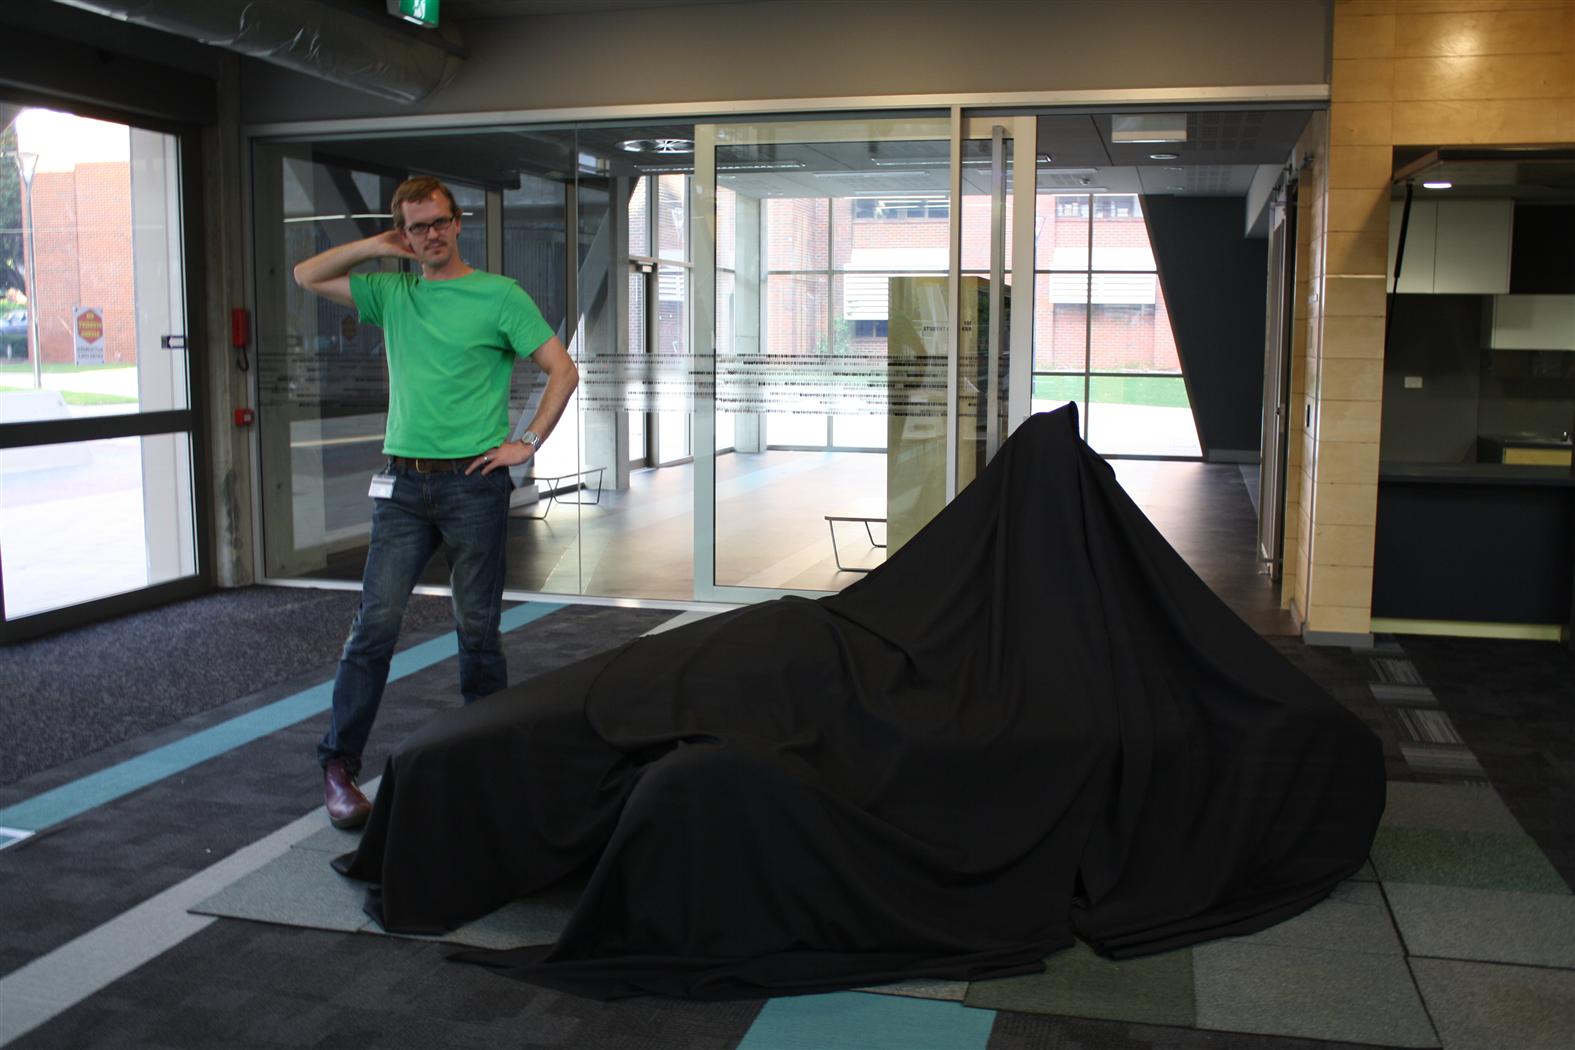
What could it be? : Tim Keely from Science and Engineering marketing at Curtin University plays for the camera just before the event started. Tim is a great help to the team and just a great fan of our work. We often work together at events such as Open Day and Careers fair in Perth to really spread the word about the opportunities that exist with engineering at Curtin University.
Talk the talk: Nathan Staats (project manager), gives a short speech about the Twenty10 race car build and our hopes for FSAE-A this year in December.

Snap shot of the short video we played, it was a collection of photo's and time lapse film taken over the year during the build of our 2010 race car. Thanks goes to Greg Miller (mechatronic engineer on the team) for putting it together for us. We will upload the video to our website and YouTube page soon.
 
Marketing stands by management: Errol Hassett (left), marketing, and Nathan Staats (right), project manager. They have so far proved to be a great team for CMT in 2010, marketing and team direction have continued to progress towards continued improvement, great work guys.

Words from above: Tilak Chandratileke (Head of Department for Mechanical Engineering at Curtin University) gives his thoughts on CMT and this years car. Tilak and the department of mechanical engineering at Curtin university are a great support to have in our corner as we do our very best to show that Curtin really is producing some of the most innovative hard working engineers around.


CMT Twenty10

Thanks to all our sponsors and supporters this year, wish us the best of luck for FSAE-A this year.


Sunday, November 7, 2010

Seat update....needs lots of adjustment

The seat is again proving to be a more challenging project than anticipated.

It has many rules governing it's position and size and so getting the belts to go through into the driver compartment is a tricky process. Also because we don't want to destroy the seat and cut holes where we don't need them it's hard to start to make cuts and holes when you really need the seat fully mounted in the chassis with a driver sitting in it to know exactly where these all go.

With the chassis unable to be soley used to mock this up at this late stage it is a bit of a guessing game, the solid works design used a model of a driver but there really is nothing liek the real thing so you can't trust this 100%.

Also makig life a little harder is the fact that the harness mounts are 30mm out of position due to a manufacturing error, it is too late to re-make these so we are using what we got but the seconday problems are just becoming a little be-motivating and slowing progress down.

I have decided that we are jst going to have t cut holes as best we can and keep cutting and shaping them till the seat sits right, we still have the mould so if need be we can add some patching to the composite lay-up later down the track once we know the belts will go where we want and comply with the rules.

Here is a few pics of the progress over the weekend...slow but now we have a pretty good game plan written down with a list of priorities to get done by our car launch this Friday, we just need it to be sitting in the car with belts through it so it looks the business, we can finalise the hard mounting points later.

Oh did I mention we all have exams over the next 3 weeks and the car goe on a truck to melbourne on the last day of exams ? This is the most fun you will have in you're engineering degree.


Above I use a drill bit that has the milling type teeth on it's shank so that I can easily cut complex curves. I start with lots of holes around the perimeter on the inside of where I want the final cut. I then mill between the holes joining them all up using the sideways cutting ability of the drill bit. Then I get a nice sharp half-round file and try to neaten up the edge. It works fairly well and is the most effective method I have found to do this type of work, I have been involved in the seat making in '08, '09 and this year so I'll building a knowledge of what NOT to do by making mistakes.....some would call it learning. Still got a lot to learn and still making mistakes but thats life, we do what we can.


Above test fitting the belt holes in the seat to see what will work and where we need adjustment. The lap belt holes (on the sides) should be ok I have marked where they need to be enlarged for the haress clips to fit through. The submarine (crotch) strap does fit through the opening but the belts will slightly rub on the seat at the moment which is no good, either have to cut the holes more to taper a slot towards the mount to enable a good angle of wrap around the drivers thighs or add a steel tube bar that just touches the underside of the seat, the belts would wrap around this so that they have a nice smooth radius transition up towards the driver, just have to ensure a good wrap around the drivers legs again though.

Saturday, October 30, 2010

Intake pictures

The intake is already fabricated and on the test engine waiting to be fully tuned but here are some pictures from manufacturing that you may not have seen.

The intake base-plate with the custom made trumpets.

These are to hold the injectors in the manifold.

Intake base-plate with the runners being postioned and taped ready for welding.


As an update to the latest progress.......

The engine side of the 2010 Curtin Motorsport Team car has been slowly but steadily progressing throughout the year. The manufacture of the exhaust is set to be completed in the coming week once the engine is mounted in the chassis and the newly purchased TIG welder arrives.


The intake is undergoing the final modifications for completion such as vacuum line barbs and fuel delivery system mounts.

The most exciting progress occurred this month when Glenn Campbell came in to help a few of the team members to start the engine with the newly acquired Vi-PEC engine management system implemented this year. After many hours of trial and error that ended in the early hours of the morning, the engine finally started.

A big thank you too Glenn Campbell for his time and knowledge.

The next step, once both the intake and exhaust are completed is to have the car dyno tuned which Glenn is once again doing for the team.

Race seat progress

Today, Tim Stockton and Errol Hassett started to lay the fibreglass and carbon onto the seat mould with help from Candice Woodhams.

Went well mostly and we are very impressed with how it is looking, we waxed the mould last night and applied PVA release agent this morning so it should come off with less effort on our part.

Above: Tim Stockton appliess layers of carbon to the mould


A days work: This is what we produced for the day, not quite finished with some sandwich material to be added and then more glass but looking the goods.

Roughly 1 layer glass, then 1 layer carbon and around 2 layers of glass on top of that at the moment. Probably put one more layer of glass on maybe 2 around the sandwich material areas. Should be ready to pull of the mould to test fit next weekend...........with a few days to spare before the car launch November 12th.

UPDATE

And here it is.......


Race Seat: The finished part (almost) in the chassis. Looks fairly good, not perfect but a marked improvement on previous years work.

Mould damage: Getting the part off the mould proved to be quite the effort and fair bit of damage was done but it should still be able to be used next year.
Hope: We hope that this years good work in design and manufacture will not go to waste next year. This mould can be repaiered and re-used to ensure the quality of CMT racecars remains to be of a high standard.
Happy as Errol ?: Errol Hassett looks happy as Larry in the new race seat. The first test fit in the chassis has been a proving of the concept (for now). The design idea and manufacture methods seem to be a success.


Dress to Impress

The CMT 2010 FSAE team should look quite charming in this year team shirt.

Thanks, again goes to the highly skilled and helpful staff at Ace Promotions, we should be sporting this flash new tops in coming weeks. A slight chnage from last years colours but still pleasing and keeping with our cars scheme we should still remain our proffessional look as we hope to continue looking as great as we feel our engineering work is.


Thanks again to all the staff at Ace Promotions for their continued help and support, with special thanks going to Michelle Pullella for providing such friendly help both in 2009 and this year.


In House Services including Embroidery, Screenprinting, Pad Printing, Large Format Printing & Direct to Garment Printing.
http://www.acepromotions.com.au/

9 Century Road, Malaga, Perth WA 6090

(08) 9248 3300

Open Weekdays 8am-5

Cockpit liner mounting bracket

With laser cutters taking a long time just to get quotes back to us some of us have started to do things the old fashioned way.

Errol needed a bracket for the cockpit liner to mount to so this is how he has gone about producing it.

  1. Model it in solidworks
  2. Print it out on paper            (very high tech)
  3. Cut it to shape
  4. Glue it to appropriate sheet steel (a glue-stick can be a handy thing to have in the workshop at times)
  5. Gut to size with angle grinder   (used a cutting disc, worked a treated, rough shaped first then neaten)
  6. Clean edges with bench grinder and sand paper    (just to get rid of burrs and sharp bits)
  7. Centre punch marks for holes
  8. Drill holes     (all the holes were basically the same diameter, made life very easy)
  9. Bend edges with Magna-bender    (often can't bend certain edges because not enough materail exposed to the magnetic strip for a great enough force to resist the bending motion, will often just lift off the bed, can become a hge pain in the butt)
  10. Bend other edges in vice with hammer and large amount of skill slash luck
  11. Test fit in chassis
  12. Hammer the bends some more
  13. Test fit again
  14. Mark position for welding
That all may seem a little silly but it got the job done and we don't have to wait weeks for the part, all in all only took 3 hours from thought "....I should make that bracket " to " I just made that bracket " so that's not so bad.

Cut and paste: The paper template glued to the sheet steel for cutting, cut the shaped pretty close 1st go but not too close then I went back and tidied up the tricky bits and fish mouthing on the ends all with the cutting disc. About 15 - 20 mins work

Bending my way around a problem: The magna-bender wasn't being friendly so I resorted to alternate methods, not pretty way to do it I know but it got the job done in the end, only had to go back and forth twice after my initial gues at the bends. Surprisingly the end product fits almost as designed, definately close enough to be deemed in the " GOOD " range of work.

The part is now mocked up in the chassis ready to be welded in place on Monday, I will upload a picture later of the final product, I seemed to have forgotten to take a happy snap of it at the time.

Tuesday, October 26, 2010

Making of the 2010 race seat / cockpit liner

• Day one – Thursday 6th Oct

Picked up the foam profile cuts from Foam Sales in Myaree this afternoon, will also have to get some more tomorrow. Time to glue the printed out templates to the MDF guide sections we cut last night.

Getting a bit Sticky: Nathan Staats spreads PVA glue on 6mm MDF board to stick printed template guides for the seat mould.

I need a chop: All the MDF section glued and ready to be jigsaw cut out.

• Day two – Friday 7th Oct

With all the MDF cut we can now assemble the seat mould pieces. Using a 4mm grouting tool we spread the PVA glue as evenly as possible on each of the 14 sections for the seat (in two halves), also used a sauce bottle to help spread the glue.


We weighted the moulds to help them have a nice strong bond and left them to dry over night.


• Day Three - Sat 8th Oct

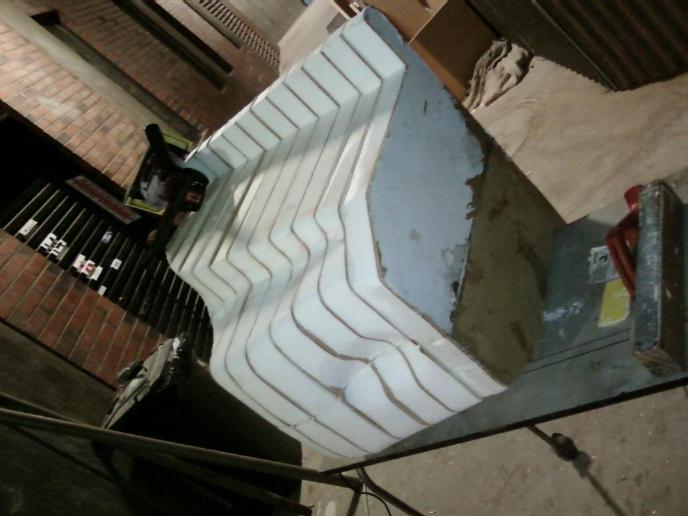
With the mould all glued we could start the seat shaping, basically sanding back the polystyrene to the mdf guides and then in a fee spots.


Used a sheet sander, with 60 grit sandpaper, to take most of the polystyrene off, quite quickly. After approximately 3 hours of shaping the seat was done.

Took a little extra time to cut and shape the pieces for the arm pockets and head rest recess. The section of the cock-pit liner in the nose of the race car was shaped the day before which also only took approximately 2 and a half hours.


Above: race seat and nose section together to make the full cock-pit liner mould.


Above: The headrest recess added and one of the arm pockets being plastered on.

White out: Errol Hassett getting overed head to toe with polystyrene dust during the shaping of the seat. The black shirt and trousers looking a combination of grey and white with all the dust. (It got even worse than this after more shaping)

• Day Four - Weds 13th Oct

With the shaping all complete we now put the plastering cement on. It’s easy to use because you just add water. We don’t really pay any attention to the correct ratios just adding water till the desired consistency is achieved.

The plaster just makes a nice surface to sand, filling small holes etc. We then coat this again to get an even smoother surface to fibreglass onto, hopefully it releases from the mould pretty easy.


• Day Five - Thurs 14th Oct

With the seat section of the cockpit liner plastered it was time to plaster the nose section. First we had to finish the prep work. Added some polystyrene to the top, just to give a lip for laying the fibreglass onto (the finished part has a cut out there so just trying to plan ahead and make life easier) also added some MDF board cut into two strips to created small shoe heel pockets added bonus is the slight increase in rigidity of that section of the liner.


We also added a piece of round poly rod to the back of the seat. We cut it in half and taped it in position by eye; the idea is partly stolen from a go-kart seat. They have a small recess to stop your spine touching the rear of the seat, instead the weight is supposedly spread along the muscles either side of the spine, it also will increase the rigidity of this section to some degree so that’s a bonus.


A little extra plaster was added t create a nice fillet edge around the spine recess and else where just to make sure the curves flowed nicely into each other, this makes it more visually pleasing and should help when trying to release the part off the mould.

• Day Six - Sat 16th Oct

With Errol Hassett looking like he was dressed for battle, we commenced sanding the plaster to a smooth finish. Using the sheet sander and 160 and 180 grit sandpaper, it’s pretty quick to achieve a nice finish.

Caution must be used sanding at this stage, it’s easy to put a gouge in the plaster with the edge of the paper, anything like that will just create problems with the final lay-up of the fibreglass so avoiding that is best, if there are any we try to take them out by hand or apply more plaster and repeat the process.

First thing that went wrong was the rolling table collapsed as Errol was taking the mould outside to sand. It was partly broken already but we were doing what we could with what we had. A disappointing start, luckily the damage to the mould was not so bad, just needed more plaster, will do that at a later date.


• Day Seven - Fri 22nd Oct

Time to do the small repairs to the rear section, which fell when the table collapsed, and sand the nose section.


• Day Eight - Sun 24th Oct

Now with all the sanding done, we apply a coat of talc and epoxy resin in a kind of slurry paste, almost like a gel coat but the cheap version. This is done to fill any small holes etc and to give a nice smooth surface for the release agent wax to be applied. After that we can start to lay the glass, finally. The final product will be shown later, we have the car launch November 12th so it must be ready before then.


UPDATE


Tim Stockton waxing the mould Friday night before we planned to lay the glass.

Adding the realease agent coating


The PVA release agent film is a blue colour which makes is easy to see where you are up to. This film will dry to a thin plastic like layer that we then lay onto. It will stick to the part and then we wash it off as it is water soluable.